Getting the Edge
Razor sharp tools are both more effective and safer to use, but it seems the mystery surrounding attaining that razor sharp, mirror finish is rated somewhere between a dark art and rocket science…. fortunately, it’s neither. While this article is focused on a chisel, the exact same methods are used for plane-irons and other straight-edged tools.
Step 1. Start by setting the primary bevel angle.
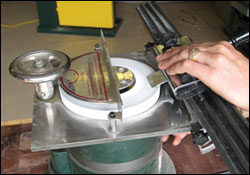
If your chisels are in OK shape other than being dull, you can skip right to step 2 or 3. However, if your chisels are severely beat up or if you want to change the bevel angle, you’ll need to remove a substantial amount of metal as the first step. As most chisels are made with a 30 degree angle, I prefer a 25 degree grind, this is a necessary first step for me. Essentially, all you are doing is using a coarse abrasive to shave down a lot of metal in a hurry. You can use any abrasive that is aggressive enough to shape the steel quickly such as 100 grit emery cloth glued to a piece of MDF or an aggressive stone, but I prefer power sharpener such as this universal surface. grinder to get through the initial stage quickly.

We aren’t worried about surface finish here, we just want to ensure a consistent, evenly flat grind across the face. Go slowly and check the surface often, and if you are power grinding, have some water close by to quench the blade should it become too hot. After this step you should end up with a surface that is rough, but flat and even.
Step 2. Time to go low-tech!
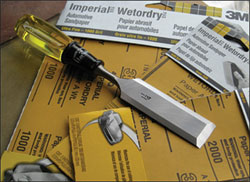
For the next step, you are going to need a few supplies. You’ll need a perfectly flat, stable surface such as piece of polished granite or thick glass ( I use a 9” X 12” piece of 1/2” thick tempered glass which I picked up for about 10 dollars from my local glass shop), 400, 800, 1000, 1500 and 2000 grit automotive “wet or dry” sandpaper, (see below) and some water to use as a lubricant. Also a good investment, an inexpensive honing guide will help maintain the proper angle and make the learning curve much faster.

Pour a small amount of water on to the glass, and place a piece of 400 grit paper on the glass (the water will actually stick the paper in place). Put some more water on the paper, and draw the chisel back across the paper, checking the surface every few strokes.
Once the surface of the blade has uniform scratches, move to the next higher grit and repeat.
Work through the grits up to 1000, then remove the bur that has formed by turning the blade over and making a few passes the with blade laying flat.
At this point, your edge should be somewhat shiny, and the chisel could actually be used as it is…..but we want to go sharper!
Step 3: Add a micro-bevel
Everybody has heard of a “micro bevel”, but what is it? A micro-bevel is a small secondary bevel that is approximately 2 degrees steeper than the main bevel. The advantage of using a micro-bevel is that it allows you to sharpen at the finest grits without having to spend all day removing material from the whole face of the chisel. Here, I increased the cutting angle by simply swing the chisel about 1/8” back into the guide and doing a few passes on the 1500 and then the 2000 grit papers. Follow each grit with a couple of passes on the back of the blade as well. At this point your blade should have an almost mirror-like finish and will readily slice paper…….but we can still go sharper!
Step 4: Polish it up for the ultimate edge.
After 2000 grit, your chisels will be very close to perfect…but there is one more step which will give a whole new meaning to the word “sharp”: Polishing (or “stropping”) with standard honing compound.

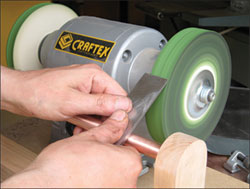
I use a hard felt wheel on a grinder modified to spin away from me for safety, but a piece of cardstock (like what is found on the back of a pad of paper) or a stiff piece of leather will works almost as well.
Apply compound to the surface, then take light passes across the micro-bevel until it shines like chrome. Follow by a light lapping on the back of the blade and your blade is now ready to be used.
A final note:
As the blade begins to dull with use, you won’t have to repeat all of the steps, generally it’s only necessary to go back to the micro-bevel stage. In fact, if you don’t let it get too dull it can be brought back to razor sharp with nothing but a quick repeat of the final honing step.
From my bench to yours,
Ryan Shervill
Master Craftsman Ryan Shervill joined the Busy Bee Pro-Staff team in 2008. He currently resides in
Penetanguishene, ON


