Machine Cut Mortise and Tenons
It’s no secret that the classic mortise and tennon joint is one of the strongest methods of joining two pieces of wood. While not overly difficult to hand cut, they can be time consuming to produce with a chisel and mallet, especially when constructing a project that requires multiple joints. Fortunately, there is an easy way to make these joints using your tablesaw, tennoning jig, and a mortising machine.
In it’s simplest form, a mortising machine is a tool that uses a combination of a spiral drill bit and a specially shaped chisel to drill square holes. A quality mortiser allows you to accurately cut mortises quickly and cleanly, and with one set up it can cut an infinite range of sizes and depths.
Steps to making machine cut mortise and tennon joints.
Because the mortises cut by the machine are a fixed width, it is a good idea to cut them first, then cut your tennons to match. To use the machine, simply mark your start/stop locations on the stock to be mortised, and set the depth stop of the machine to your required depth. Square up the bit to the stock: It is
imperative that the chisel enters the stock square to the edges to ensure clean sidewalls of your mortise. The easy way to do this is to place the stock behind the chisel against the fence, loosen the chisel retaining screw slightly so the chisel can rotate, and then slide the fence and stock forward until it butts up against the backside of the chisel. Tighten the chisel retaining screw, and the chisel is now locked square to the fence.
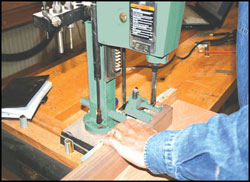
Cut some holes: Position the fence so the chisel is positioned correctly over your stock, and cut the two outside holes of your mortise. By cutting these two holes first, you ensure the accuracy of the overall mortise length, and because the bit is supported on all four sides during these cuts your mortise is guaranteed to have perfectly vertical end-walls. Next, you will want to clear out the remainder of material for the mortise by plunging the bit, moving over a full chisel width and repeating until the mortise is complete.
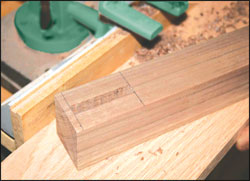
Making a matching tennon.
A tenon jig is a tool that is designed to carry stock over the blade on your tablesaw while held vertically to cut the cheeks of the tennons. By being able to accurately and safely make these cuts with the stock “standing on end”, cutting perfectly fitting tennons has never been easier.
To make the tennons:
1.With a marking gauge or pencil, mark out the cut lines for your first tennon showing the shoulder location as well as the width of the tennon.
2. Using your miter gauge on the tablesaw, cut the shoulders of the tennons, rotating the stock until all four cuts are made. Tip: To ensure clean, defined shoulders, raise the blade slightly higher (1 /32” or so) than required for these cuts. The resulting groove on the completed tennon will ensure a clean inside corner and also give any glue squeeze out a place to go during assembly.
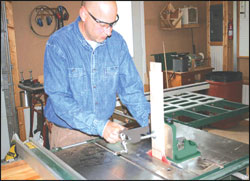
3. Clamp the stock vertically in your tennoning jig and cut the cheeks of the tennon.
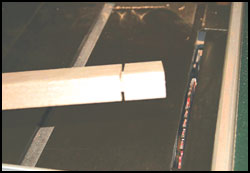
4. Remove the waste from the top and bottom of the tennon with a sharp chisel and test fit. If your tennon is too snug, you can trim it by using the micro-adjust on the tennoning jig and making another pass on both sides. Just take it slow and sneak up on the perfect fit. If you initially cut your tennon too thin, you can build it back up by gluing a piece of veneer to the cheeks and clamping until dry.
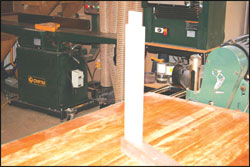
That’s it! Strong, perfectly fitting mortise and tennon joints quickly and easily.
From my bench to yours,
Ryan Shervill


