Rough to Ready
When it comes to buying lumber for your projects, consider buying rough sawn lumber and surfacing it yourself. Not only will you get higher quality lumber, but you will get it in exactly the size you want at a price that’s generally up to 75% less than buying surfaced lumber at the home store.
To dress your own lumber you’ll need a few machines; A Jointer, a planer, and a table saw. Planers and jointers….. What’s the difference? Although similar in how they work, planers and jointers perform different functions and need to work together to get straight and flat lumber. A jointer makes a board flat, but can’t make it an even thickness. A planer makes the surfaces parallel, but can’t make a curved board straight. Essentially this means that if you feed a curvy rough board into your planer, you will get a curvy smooth board out the other side. Here’s how you do it.
Step 1: Joint one face:
By initially ensuring a perfectly jointed face, the remaining operations will yield a perfectly flat, straight and square piece of lumber. Place the material on the jointer bed with any cup or bow down on the table, with the grain running off the board towards the in-feed side (So you joint with the grain). Set the in-feed table to a depth of 1/16” or so, and using push pads, make a pass. Begin the pass applying pressure to the board on the in-feed side, and once 25% of the board has passed the cutterhead, transfer the downward pressure to the out-feed table (do not put your hands over the cutterhead!).
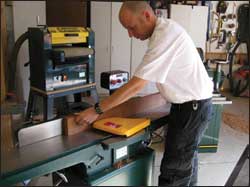
Complete the pass and check for a flat, straight surface.
If the surface is not perfect, repeat the above steps until the jointer takes an even full length.
Step 2: Joint one edge:
With the jointed face against the fence, repeat the above steps with the board on edge. Once completed you will have a board with 2 good faces at 90 degrees to each other.
Step 3: Straighten the other edge.
Move to the table saw and place the board with the jointed face down on the table and the jointed edge against the fence, then use the saw to rip off the remaining rough edge on your board.
Step 4: The planer
Set your planer to take a light cut, and feed the board rough side up through the planer. Pay attention to the grain direction, and keep in mind that unlike the jointer, the cutterhead on a planer is at the top, so you will need to feed the lumber with the grain running off the top edge of the board, angling towards the in-feed side of the planer.
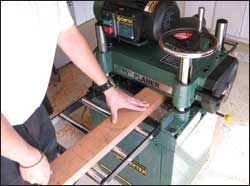
Lower the cutter head around 1/16”, and continue taking passes with the planer until your lumber is at the desired thickness. .
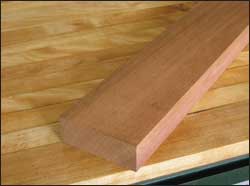
That’s it! What was inexpensive rough sawn lumber is now a fully dressed board ready to be turned into a knockout project.
From my bench to yours,
Ryan Shervill
Busy Bee Tools is proud to announce a new partnership with Master Craftsman & DIY expert Ryan Shervill.
With 15 years practicing his craft,
Ryan brings a wealth of knowledge to share with our customers.


